Anúncios
Será que algumas dicas simples podem transformar uma refeição rápida de dia de semana em um prato digno de restaurante?
Este guia mostra como o calor rápido e uma pequena quantidade de gordura criam uma textura marcante e uma cor profunda. sabor Em minutos. Explica uma sequência clara: pré-aqueça a frigideira, aqueça o óleo, mantenha os itens em uma única camada, doure e finalize.
Os leitores recebem dicas práticas que qualquer pessoa pode ver ou cheirar, então em casa culinária O resultado é uma carne crocante e macia, em vez de mole ou amarga. O foco está nos sinais visíveis e na facilidade de preparo. técnicaSem ingredientes sofisticados ou palpites.
Prepare-se para um guia prático e conciso sobre como preparar a frigideira, o óleo e os pontos ideais de dourar. As dicas funcionam tanto para vegetais quanto para proteínas, economizando tempo e melhorando os resultados.
Grande recompensa: Melhor dourado sem queimar, sem amargor e sem pratos encharcados — apenas passos claros para repetir em qualquer noite da semana.
Anúncios
Por que o tempo é importante ao refogar (e por que os alimentos devem "pular")
Movimentos rápidos e uma frigideira quente não são truques — são as chaves práticas para resultados consistentes.
Quando um alimento entra em contato com uma superfície quente com movimentos rápidos, ele adquire cor e permanece macio. refogar vem do francês Sauter, que significa “pular”. Mover ingredientes com o movimento do pulso ou com um espátula Propaga o contato e impede a queimadura.
O método é simples: um curto período em fogo alto cria uma crosta dourada sem cozinhar demais o interior. técnica Mantém os vegetais com cores vibrantes e as proteínas suculentas.
- Em termos simples: os alimentos "saltam" em uma frigideira quente com uma pequena quantidade de gordura e movimentos rápidos.
- O movimento expõe novas superfícies, distribui o calor uniformemente e evita queimaduras.
- O calor rápido preserva a textura crocante e macia. textura e promove um dourado saboroso.
- Use pistas sensoriais — como o chiado ao contato, a mudança de aroma de cru para amendoado e o douramento visível — para determinar o tempo correto de cozimento.
Cozinhar rápido é algo planejado, não feito por descuido. Ajuste. temperatura e vá adicionando ingredientes conforme a necessidade. A mesma lógica se aplica às proteínas: um douramento rápido da superfície garante profundidade sem ressecar o interior. Para uma análise mais aprofundada sobre como controlar o calor, veja o técnicas de temperatura guia.
Qual a diferença entre refogar, fritar e saltear?
Cozinheiros amadores frequentemente chamam erroneamente preparações rápidas na frigideira de fritura, mas os métodos visam resultados diferentes.
Saber se os alimentos devem nadar no óleo ou simplesmente deslizar sobre uma superfície lisa altera os resultados rapidamente. Um método utiliza um pequena quantidade de gordo para revestir o frigideiraUma das opções utiliza óleo suficiente para submergir parcialmente o alimento; a outra usa óleo suficiente para esse fim. A escolha afeta a textura, a cor e o tempo de imersão.
Pequena quantidade de gordura versus nadar em óleo
Um método rápido de panela usa um pequena quantidade—geralmente 1 a 2 colheres de sopa de óleo—apenas para alisar a superfície. Fritar usa muito mais óleoE a comida pode acabar ficando gordurosa em vez de crocante.
Fogo alto, tempo de cozimento curto versus fogo moderado, tempo de cozimento mais longo
Uma abordagem é um sprint: alta aquecer e curto tempo para dourar as bordas sem encharcar. Fritar e por mais tempo culinária As sessões ocorrem em temperaturas moderadas e precisam de mais óleo para transferir o calor uniformemente.
Por que a forma de uma frigideira muda devido ao movimento dos ingredientes e à evaporação?
Frigideiras com laterais curvas facilitam virar os ingredientes e permitem que eles "saltem". Superfícies largas e planas espalham os alimentos e aceleram a evaporação, fazendo com que dourem em vez de cozinharem no vapor.
“Se a comida estiver nadando, não dá para usar o método rápido da frigideira; se estiver amontoada e úmida, não vai dourar direito.”
- Regra de decisão: não é permitido nadar — cubra o frigideiraNão o afogue.
- Compare os utensílios: uma frigideira ou uma panela para refogar. frigideira Em comparação com uma wok, a maneira de refogar e dourar os alimentos muda.
- Diariamente pratos Assim como vegetais, camarão e filés de frango finos, essas diferenças são essenciais para resultados excelentes.
Truques de tempo no refogado que realçam os sabores
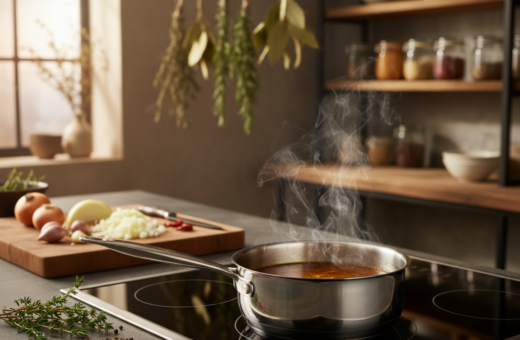
Uma frigideira bem aquecida e uma camada cuidadosa de gordura criam as condições ideais para um dourado perfeito e um resultado ainda melhor. saborEssa ordem — primeiro a panela, depois o óleo e, por último, o alimento — reduz a aderência e ajuda a superfície a dourar uniformemente.
Primeiro pré-aqueça e depois adicione o óleo: esse é o fator que reduz a aderência.
Pré-aqueça até que a panela esteja uniformemente quente. Principalmente com aço inoxidável, adicione óleo Uma superfície verdadeiramente quente impede que os alimentos grudem no metal.
Adicione o óleo, gire para cobrir e espere até que um brilho visível apareça antes de adicionar os ingredientes.
Brilho, espuma, fumaça: usando pistas visuais para se manter abaixo do ponto de fumaça.
Fique atento a um brilho de óleo ou espuma de manteiga; ambos são sinais claros de que a gordura está pronta para... aquecerEvite o visível fumaça, que marca o ponto de fumaça e uma mudança em direção a notas amargas.
Quando fumaça Se aparecer alguma falha, reduza o fogo ou troque a gordura para manter os sabores puros.
Primeiro doure, depois tempere e finalize: construindo o sabor em camadas.
Deixe o alimento repousar tempo suficiente para que ocorra a reação de Maillard. escurecimento antes de movê-la. Essa janela intocada cria uma sensação de carinho e profundidade. sabor.
Após selar bem a carne, adicione os temperos ou finalize com os ingredientes desejados. manteiga para que realcem em vez de queimarem. Ajustar tempo dependendo da umidade ou da espessura da proteína.
- Sequência: Panela quente → óleo → comida.
- Sinais visuais: Brilho, espuma, sem fumaça.
- Sobreposição de camadas: Primeiro o marrom, depois a estação.
Escolha a panela certa para um refogado em fogo alto.
A escolha da panorâmica é uma ferramenta de controle de tempo. O material e o formato controlam a rapidez com que a umidade evapora e a uniformidade da retenção na superfície. aquecerEscolher o utensílio certo ajuda os alimentos a dourarem no tempo certo, em vez de cozinharem no vapor ou queimarem.
Aço inoxidável para dourar e fundir
O aço inoxidável é a escolha ideal para dourar de forma precisa. O aço liso aço a superfície favorece a formação de fungos no fundo do frigideira, que se torna a base para molhos rápidos.
Aviso: O aço inoxidável pode grudar se a superfície não estiver suficientemente quente ou se o óleo for adicionado muito cedo.
Ferro fundido e aço carbono para temperatura constante
Ferro fundido e aço carbono resistem aquecer Bem, eles não se incomodam com as quedas de temperatura quando alimentos frios entram em contato com a comida. superfície, para que o douramento permaneça consistente.
Peças fundidas bem temperadas tendem a ser mais tolerantes durante movimentos e agitações.
Por que as panelas largas e de fundo plano ajudam a umidade a evaporar rapidamente?
Panelas largas, de fundo plano e laterais baixas, distribuem os ingredientes em uma única camada. Isso acelera a evaporação e preserva a cor dourada.
“O calor seco é a melhor opção: superfícies amplas evitam a formação de vapor e aceleram o desenvolvimento da cor.”
- Tamanho responsivo: Escolha uma panela que você possa manusear com facilidade para misturar os ingredientes rapidamente.
- Use a panela como cronômetro: O material certo mantém a produção de alimentos dentro do prazo.
- Expectativas: Aço inoxidável para o fundo, ferro fundido para calor constante, fundo largo para evaporação rápida.
Noções básicas sobre óleo, manteiga e ponto de fumaça para um sabor melhor.
Escolher a gordura certa para cozinhar faz toda a diferença entre uma selagem perfeita e um sabor amargo no final.
Escolha as gorduras pelo seu ponto de fumaça para que a panela permaneça em uma faixa de temperatura ideal. Quando um óleo começa a soltar fumaça, sabor A tendência é para notas ásperas e o período ideal para refogar já passou.
Escolher gorduras que suportem altas temperaturas.
Óleos neutros como canola, girassol e amendoim têm pontos de fumaça mais altos. Eles são adequados para selar alimentos em altas temperaturas em diversas situações. pratos sem se tornar amargo.
Azeite de oliva, manteiga clarificada e manteiga comum.
Extra virgem azeite Dá aroma, mas pode ficar amargo se a panela estiver muito quente. Clarificado manteiga resiste a níveis mais altos aquecer e mantém o sabor amanteigado. Regular manteiga Forma espuma quando está pronta, mas pode queimar rapidamente.
O que é considerado uma “pequena quantia” e por que isso importa.
UM pequena quantidade Significa apenas o suficiente para cobrir a frigideira com uma fina camada brilhante. Pouco óleo aumenta o risco de grudar e queimar; óleo em excesso retarda o processo de dourar e transforma o cozimento em uma fritura, em vez de um trabalho rápido na frigideira.
- Sinais visuais: O óleo deve brilhar, a manteiga deve espumar; fumaça visível é um sinal de pare.
- Dica: Misture um pouco de óleo com manteiga para dar sabor e maior tolerância ao calor.
Para uma introdução prática à técnica de cozimento em panela, veja um breve guia sobre como refogar.
Tempo de preparo: Corte no tamanho certo, seque as superfícies e organize os ingredientes.
Um refogado rápido e controlado começa muito antes de o fogo ser aplicado — começa na tábua de corte.
Peças uniformes para um cozimento homogêneo e um dourado consistente.
Corte os ingredientes em pedaços iguais para que cada pedaço precise da mesma quantidade. tempo Para finalizar. Tamanho uniforme significa que os legumes e o frango douram juntos, e não em lotes separados.
Estratégia de secagem rápida para reduzir a água na superfície
Seque os legumes e o frango com papel toalha antes de colocá-los na panela. Remova o excesso. água Impede a formação de vapor e acelera escurecimento.
Prepare os aromáticos para que o alho não queime.
Reserve o alho para o último minuto ou adicione-o às partes mais úmidas da panela. O alho queima rapidamente e fica amargo se entrar em contato direto com óleo muito quente.
Cebolas e mise en place para um fluxo suave
As cebolas podem ser adicionadas no início para uma caramelização adocicada ou mais tarde para um amolecimento rápido. O cozinheiro deve organizar os ingredientes na ordem de cozimento para evitar interrupções no fogão.
- Regra: Assim que a panela estiver quente, não pique mais nada — esteja pronto.
- Organize as tigelas com legumes, frango e temperos em sequência.
- Pequenas etapas de preparação mantêm a panela em movimento e o prato consistente.
Ajustando a temperatura sem palpites
Um teste visual rápido elimina as suposições e ajuda o cozinheiro a atingir a temperatura correta todas as vezes.
Comece de forma simples: Para o aço inoxidável, uma pequena gota de água fornece uma leitura clara do ponto de cozimento. Salpique uma ou duas gotas em uma panela pré-aquecida. Se as gotas formarem bolinhas e dançaA superfície atingiu a temperatura desejada e está pronta para receber óleo e alimentos.
Teste da gota de água para aço inoxidável (borrão e movimento)
Quando as gotas se enrolam formando pequenas bolinhas e se movem, a panela mantém o calor uniformemente e reduz a aderência dos alimentos. Se a água chiar formando uma poça uniforme, a panela está muito fria. Se a água evaporar e virar fumaça, abaixe o fogo.
Quando começar em fogo médio-alto e quando diminuir o fogo para evitar queimar o fogão.
Para começar, uma boa configuração é fogo médio-alto na maioria das frigideiras. Assim que o alimento tocar a superfície, observe e ouça: um chiado constante significa que a temperatura está correta. Se a superfície começar a fumegar ou dourar muito rápido, reduza o fogo para evitar que os alimentos queimem.
- Deixe a panela recuperar a temperatura entre as fornadas; alimentos frios reduzem a temperatura da superfície.
- Use o aroma e o som como pistas — fumaça intensa indica que o aquecimento deve ser interrompido, enquanto borbulhas silenciosas geralmente significam excesso de umidade.
- O objetivo é um dourado uniforme e um aroma limpo, não a chama máxima o tempo todo.
Um método passo a passo para controlar o tempo de qualquer refogado.
Um método claro, passo a passo, elimina as dúvidas e mantém a panela funcionando para você.
Aqueça a panela e verifique se está pronta.
Aqueça a panela até que esteja uniformemente quente. Use o teste da gota de água ou passe a mão rapidamente por perto para verificar se o calor está constante.
Por que: Uma panela pré-assada evita que os alimentos grudem e garante um início rápido do processo de dourar.
Adicione o óleo e espere o brilho aparecer.
Aplique uma fina camada de óleo e observe se surge um brilho visível ou um leve movimento na superfície. Esse brilho indica o momento certo para adicionar o alimento.
Adicione os alimentos em uma única camada para evitar que a panela fique muito cheia.
Disponha os ingredientes de forma que cada pedaço toque a superfície. Evite sobrecarregar a panela para interromper a formação de vapor e manter o calor intenso para dourar.
Deixe dourar por tempo suficiente e depois misture com uma espátula.
Deixe as peças em repouso até que as bordas mostrem cor e se soltem naturalmente. Use uma espátula ou um movimento rápido com o pulso para movê-las e expor novos pontos de contato.
Saiba quando está pronto: cor, aroma e textura crocante e macia.
Para determinar o ponto de cozimento, observe a cor mais intensa, o aroma de nozes e a textura crocante, porém macia, no caso de vegetais, ou a cor externa bem dourada, no caso de proteínas.
- Lista de verificação: Pré-aqueça → confirme → aplique óleo → dê brilho → aplique uma única camada → deixe dourar → descarte.
- Se o chiado diminuir e o líquido se acumular, faça uma pausa para deixar a umidade evaporar ou termine em lotes para evitar superlotação.
- Faça pausas curtas entre as fornadas para que a panela recupere o calor e o cozimento permaneça uniforme.
“Uma rotina curta e constante mantém a panela na temperatura ideal de trabalho e o alimento na textura perfeita.”
Evite a superlotação: a solução mais rápida para alimentos pastosos.
Distribuir os ingredientes uniformemente pela superfície faz com que o calor trabalhe a seu favor, e não contra você.
O excesso de comida na panela esfria e força os legumes a liberarem água em excesso. Essa água retida cria vapor e amolece os vegetais em vez de dourá-los.
O que você precisa saber é: um chiado forte significa contato adequado e uma boa selagem. Um chiado baixo e fraco indica que está cozinhando no vapor por causa da superlotação. Ajuste cozinhando em lotes para restaurar o som e a temperatura da superfície ideais.
Cozimento e conservação em lotes práticos
Prepare uma primeira leva e, em seguida, mantenha os alimentos prontos aquecidos em uma grade baixa do forno ou em um prato coberto com papel-alumínio. Evite mantê-los aquecidos por muito tempo para que não continuem cozinhando e percam a crocância.
Escolha o tamanho certo
Para a maioria das receitas caseiras, uma assadeira de 25 a 30 cm é suficiente para uma porção familiar e ajuda a manter os alimentos em uma única camada. A área da superfície é mais importante do que a profundidade para uma evaporação rápida e recuperação constante do calor.
“O espaço vazio na panela não é desperdiçado — é ali que começa o bom douramento.”
- Causa e efeito: superlotação → menor temperatura → água retida → textura mole.
- Use uma segunda panela ou prepare lotes rápidos para obter tempos de preparo mais precisos e melhores resultados.
A escolha do tempo certo para adicionar ingredientes aromáticos e temperos, maximizando o sabor.
Saber o momento certo de adicionar cebola, alho e ervas ajuda a manter a textura crocante e os aromas vibrantes. Uma boa sequência de ingredientes faz com que todo o prato harmonize perfeitamente, sem comprometer as nuances delicadas ou amolecer a textura prematuramente.
Cebolas: de cozimento lento e adocicado ou de cozimento rápido e macio.
Para um dourado adocicado, adicione as cebolas no início, em fogo médio, e deixe-as amolecer até que as bordas caramelizem. Isso libera os açúcares naturais e intensifica a cor. sabor.
Para uma experiência mais fresca, adicione as cebolas mais tarde, para que elas mantenham um pouco de crocância e um sabor mais puro no prato final.
Alho e controle de calor
O alho queima rápido e fica amargo. Adicione o alho depois que o ingrediente principal começar a dourar e quando o fogo estiver um pouco mais baixo. Isso preserva o aroma e evita notas ásperas.
Opções de sal e umidade
O sal extrai a umidade dos ingredientes; salgar cedo pode acelerar a evaporação, resultando em um melhor douramento. Mas se um crocante textura O objetivo é esperar e temperar mais tarde para que os líquidos não se infiltrem prematuramente.
Finalize com ervas frescas.
Adicione ervas delicadas perto do final para que seu aroma permaneça vibrante. Prove e ajuste no final: a evaporação pode concentrar o sal e alterar o sabor final. sabor.
- Regra prática: Cebolas frescas para um sabor adocicado, cebolas mais tarde para um toque picante.
- Alho dourado e cozido em fogo controlado.
- As ervas são adicionadas por último para preservar o aroma.
Guia de tempo de preparo dos vegetais: crocantes, porém macios, não moles.
Agrupar os vegetais por umidade e densidade torna o acabamento simples e previsível.
Antes de aquecer a panela, o cozinheiro deve separar os vegetais em pilhas de úmidos, firmes e folhosos. Isso evita que a umidade se transforme em vapor, preservando a cor vibrante e o sabor. textura.
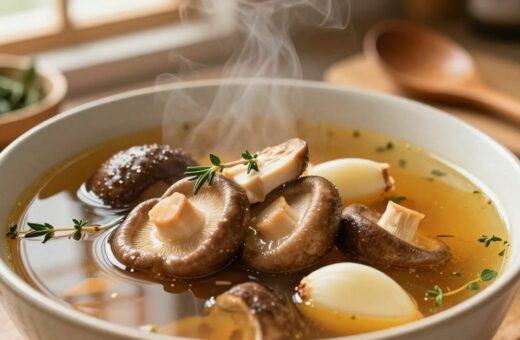
Vegetais com alto teor de umidade e uma estratégia para dourar
Para abobrinhas e cogumelos, use uma panela bem quente. frigideira, uma única camada e paciência. Deixe os pedaços descansarem até que as bordas dourem antes de mexer, para que a superfície possa selar e o excesso de umidade evapore.
Vegetais firmes e adições graduais
Comece com as cenouras e os pimentões; eles precisam de mais tempo e aquecer para amolecer. Adicione os itens de velocidade média mais tarde para que tudo termine junto sem sobrecarregar o recipiente. frigideira.
Verduras folhosas e um acabamento ultrarrápido
O espinafre e outros vegetais verdes semelhantes murcham em segundos. Adicione-os por último, misture rapidamente e retire logo em seguida para evitar um prato aguado.
- Agrupe por umidade e densidade. Para simplificar a sequência.
- Use um quente frigideira e camadas únicas para melhor desempenho escurecimento.
- Colha os vegetais cedo — resíduos aquecer irá finalizá-los e garantir resultados crocantes e macios.
Guia de Tempo Ideal para Consumir Proteínas: Frango, Camarão e Peixe que Douram Lindamente
As proteínas precisam de preparo simples e habilidade no manuseio da frigideira para desenvolver uma crosta perfeita sem cozinhar demais.
Seque, tempere e sele: o ponto certo para uma boa crosta.
Seque bem as proteínas com papel toalha antes de temperar. Uma superfície seca ajuda a acelerar o processo. escurecimento e impede que o excesso de umidade cozinhe o vapor. frigideira.
Aqueça o frigideira Até o óleo brilhar, adicione o frango ou o peixe. Esse breve contato cria uma crosta saborosa rapidamente.
Não se apresse: quando as proteínas se desprendem naturalmente do aço.
Sobre aço inoxidávelOs pedaços costumam grudar no início e depois se soltam quando a crosta estiver dourada. Evite virar até que as bordas douradas comecem a subir pelas laterais.
Quando a proteína se desprende sem se romper, está pronta para se transformar.
Regras de espessura: ajuste o tamanho do corte ao tempo de cozimento
Cortes finos secam rapidamente em superfícies altas. aquecerFilés grossos precisam de menos aquecer ou um acabamento em duas etapas para evitar uma superfície queimada e o centro exposto.
- Preparação: Seque, tempere e pré-aqueça.
- Sinal para virar: Bordas douradas e aroma tostado.
- Proteínas de rápida absorção: Camarões e peixes magros devem ser cozidos em fogo alto. frigideira e se mover rapidamente.
“Deixe o contato formar a crosta; a liberação é o sinal do cozinheiro.”
Deglaçar e preparar o molho na panela usando o fondant no fundo da panela
O resíduo marrom no fundo da panela é uma fonte concentrada de sabor; deglaçar é a maneira mais rápida de transformá-lo em molho.
Quando retirar os alimentos antes de deglaçar
Retire a proteína principal ou os vegetais assim que descansarem e atingirem a cor desejada. Isso evita que cozinhem demais, enquanto a panela se torna o palco para o molho.
O que usar para deglaçar: vinho, caldo, vinagre ou água.
- Vinho: Realça o sabor, adicionando acidez e profundidade para um molho mais encorpado.
- Caldo: Cria corpo saboroso sem adicionar acidez acentuada.
- Vinagre: Use um pouco para dar brilho e equilibrar a intensidade — pequenas quantidades já fazem muita diferença.
- Água: A opção mais suave; ela solta o fundo da panela e mantém o molho leve.
Reduzir o tempo de preparo resulta em um molho brilhante e rápido.
Cozinhe em fogo baixo por alguns instantes até que o fundo da panela se dissolva e o líquido reduza, formando uma camada brilhante. O objetivo é uma redução rápida para que o molho engrosse sem ficar salgado ou pegajoso; um ou dois minutos costumam ser suficientes.
Mantenha o fogo controlado para que os ingredientes aromáticos não queimem. Volte a colocar o alimento na panela apenas o tempo suficiente para cobri-lo com o molho.
"Deglaçar transforma o fundo da panela em uma maneira rápida de aprimorar um prato simples, concentrando os sabores."
Solução de problemas de sincronização do refogado em tempo real
Se a comida gruda, solta fumaça ou fica mole, algumas verificações simples revelam a causa principal.
Alimentos grudando: soluções rápidas
A aderência do óleo geralmente indica pré-aquecimento inadequado ou ponto de lubrificação incorreto. Aumente o pré-aquecimento em 30 a 60 segundos e teste com uma pequena gota de água.
Consertar: Adicione o óleo somente depois que a superfície estiver quente e espere até que ela brilhe. Evite mover as peças até que se soltem naturalmente.
Queimadura: resfrie e reinicie
Calor excessivo ou aromas muito intensos podem queimar os alimentos rapidamente. Se aparecer fumaça, abaixe o fogo imediatamente.
Remova ingredientes aromáticos delicados, como o alho. Se necessário, limpe a panela e adicione uma gordura mais limpa para limpar a superfície.
Textura encharcada: recupere a crocância
Água em excesso ou panelas muito cheias resultam em uma massa mole. Reduza a quantidade de ingredientes e seque-os bem antes de colocá-los na panela.
Aumente a área de superfície e finalize fornadas rápidas em uma panela quente para que a evaporação contribua para uma textura crocante.
Douramento irregular: pedaços uniformes, contato uniforme
A coloração irregular geralmente resulta de cortes desiguais ou pontos muito quentes. Corte os ingredientes uniformemente e gire a panela sobre a chama do fogão.
Misture estrategicamente para que cada pedaço entre em contato direto com a água e doure por igual.
“Observe, escute e aja — pequenos ajustes no aquecimento, no óleo ou na carga resolvem a maioria dos problemas.”
- Se estiver grudando → pré-aqueça por mais tempo e verifique o brilho do óleo.
- Queimando → reduza o fogo, retire os aromáticos e renove a gordura, se necessário.
- Massa encharcada → lotes menores, ingredientes mais secos, maior exposição da superfície.
- Cor irregular → cortes uniformes, gire a panela, misture com intenção.
Conclusão
Resultados consistentes começam com uma lista de verificação simples: Uma frigideira quente, o óleo certo e uma única camada de alimento. Esses poucos cuidados ajudam a selar a superfície rapidamente e a manter o interior macio enquanto... aquecer permanece sob controle.
Observe se há um brilho visível, um chiado constante e ausência de fumaça. Esses sinais permitem que o cozinheiro avalie o ponto de cozimento. tempo e mova-se com confiança. Use o correto técnica para cada ingrediente e evite aglomerar para proteger a textura e sabor.
Algumas dicas para obter resultados imediatos incluem secar os ingredientes, dispor o alho e as ervas em locais estratégicos e escolher a panela certa para cada tarefa. Com a prática, refogar torna-se intuitivo. Trate isso como guia como um modelo repetível para legumes, frango, camarão e molhos rápidos de frigideira.